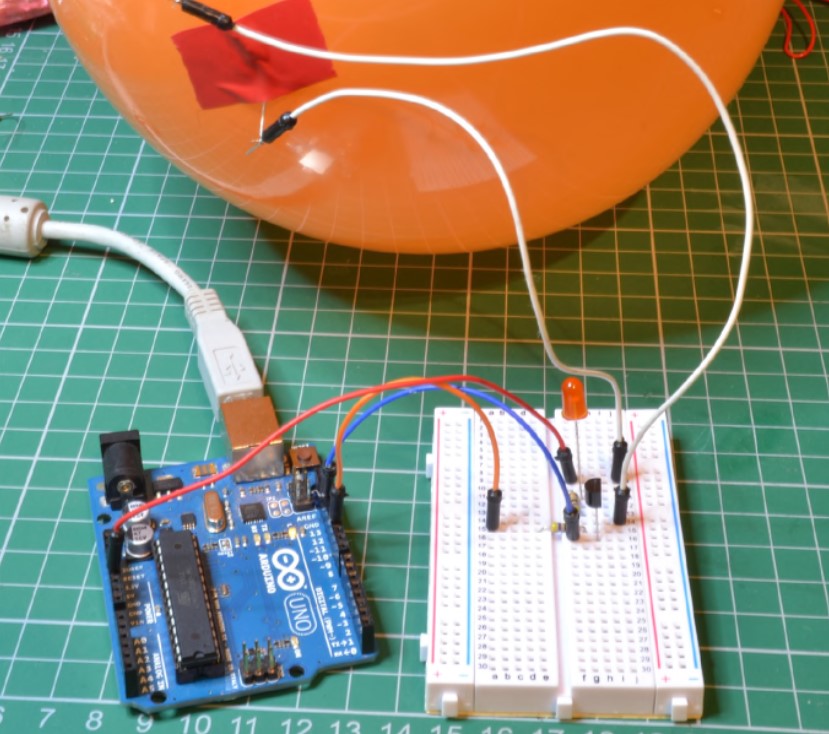
Don't think that this project is driven by a fear of balloons. We're simply going to use an Arduino board to control a resistor attached to the balloon, acting as a heating element. After a random period of time, the resistor will turn on and, once heated, will make the balloon pop (see the image below).

-
asd.jpg (132.43 KiB)
The machine that makes the ball burst is complete Viewed 22921 times
Please note that this project involves significant danger. The heating of the resistor, sufficient to make the balloon burst, is also enough to harm the experimenter. During the experiment, smoke might be produced.
BURN HAZARD
In this project, heating the resistor causes the balloon to burst, which means it becomes hot enough to burn the experimenter's fingers. Do not touch the resistor while it's powered. You can touch it no sooner than 30 seconds after power-off.
There is also a risk of fire, so it's advisable to have a fire extinguisher nearby just in case. Additionally, when the balloon bursts, the resistor may detach from it. To avoid getting a hot resistor in your eye, it's recommended to wear safety goggles during the experiment.
Components
For this experiment, you will need the following components to work with Arduino:
- R1, R3 - 470-ohm, 0.25-watt resistors
- R2 - 10-ohm, 0.25-watt resistor
- Q1 - Composite transistor MPSA14
- LED1 - Red LED
- 400-point breadboard
- Jumper wires
You should get a few 10-ohm resistors since they are likely to produce smoke during the experiment.
Project Setup
When the composite transistor activates, the voltage across the resistor reaches approximately 3.5V. In this case, the current passing through the resistor is:
3.5V / 10 ohms = 350mA
Any USB device providing power for this project can handle this current.
The thermal power dissipated on the resistor will be: I x V = 350mA x 3.5V = 1.225 watts
This is much higher than the nominal power of 0.25 watts for which the resistor is rated. However, even with such overload, it can last long enough for the balloon to burst.
The layout of the breadboard for this project is shown in the image below.

-
image.png (163.31 KiB)
Layout of the breadboard for the balloon project Viewed 22921 times
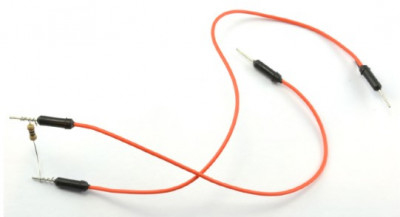
Please note: the resistor should be securely attached to the connectors of the power wires to prevent it from moving when the balloon bursts.

-
image.png (73.59 KiB)
Connecting the resistor terminals Viewed 22921 times
Program
In this project, the Arduino reset button serves as the initiator of the launch. The Arduino program runs immediately after loading, so one of the wires going to the resistor should be kept disconnected until you are ready to pop the balloon.
Code: Select all
const int popPin = 11;

const int minDelay = 20;   // Seconds (1)
const int maxDelay = 200;  // Seconds
const int onTime = 15;     // Seconds (2)

void setup() {
  pinMode(popPin, OUTPUT);
  randomSeed(analogRead(0));   // (3)
  long pause = random(minDelay, maxDelay+1);   // (4)
  delay(pause * 1000);             // (5)
  digitalWrite(popPin, HIGH);      // (6)
  delay(onTime * 1000);
  digitalWrite(popPin, LOW);
}

void loop() {
}
Let's go through some aspects of the sketch step by step using the annotations in the comments:
1. The constants
minDelay and
maxDelay define the boundaries of the acceptable time range during which power can be applied to the resistor, causing the balloon to burst.
2. The constant
onTime determines how long the resistor should be on. To choose the right value, you will need to conduct a series of experiments. The resistor should not be kept on for a long time, as it will quickly fail.
3. The random numbers in Arduino are not truly random; they are part of a long pseudorandom sequence. To ensure a different delay each time the program starts, this line sets the position in the pseudorandom sequence based on reading the value of analog input A0. Since this input is unconnected and affected by noise, its value can be considered somewhat random.
4. The pause before turning on the resistor is determined by the
random function, which returns a random number between two values specified as parameters. Adding 1 to the second parameter ensures that the range is always achievable. To allow for delay ranges beyond 32 seconds, a
long variable is used, as the
int type can only hold numbers up to 32,767.
5. Delay before turning on in seconds.
6. Activation of the transistor and powering the resistor, followed by a delay in the on state for
onTime seconds and turning off the resistor.
Uploading and Running the Program
During the project's preparation stage, it's a good idea to initially set the values of
minDelay and
maxDelay to 2 and 3, respectively. This will give you confidence that the time required for the balloon to burst has been selected correctly.
Attach the resistor to the balloon using adhesive tape and connect the resistor's leads to the power wires.
Press the reset button and wait for the balloon to burst.